
This Is How To Truly Fix A Lateral Pelvic Tilt (Hip Hike)
Mar 26, 2025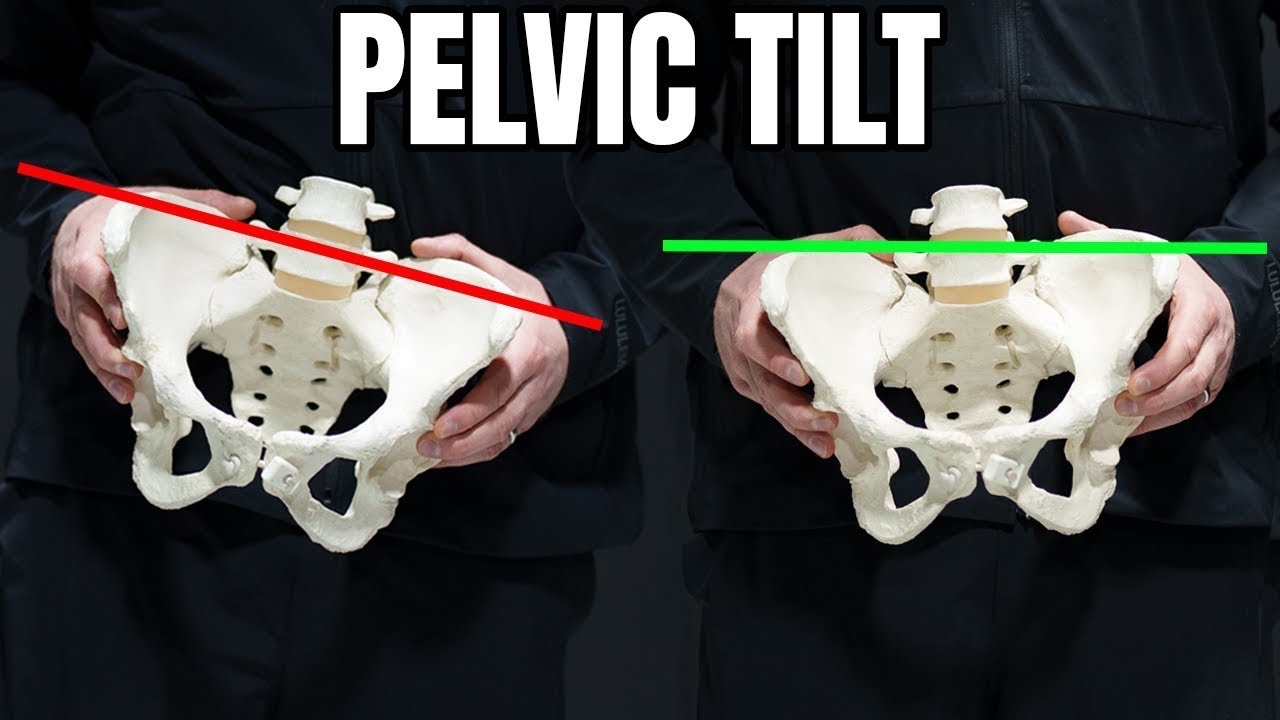
A Lateral Pelvic Tilt, or Hip Hike, is a full body compensatory pattern rather than muscle tightness around the hip.
In order to understand why this happens and what we can do about it, we should first understand what causes it and what it is!
In this article I am going to:
- Talk about what a Lateral Pelvic Tilt is
- How a Lateral Pelvic Tilt can impact assessment measurements
- Exercises we can use to improve it
If you’d rather watch a full description of this article to get a better understanding visually of what is happening, then join check out this youtube video below:
What Is A Lateral Pelvic Tilt
A lateral pelvic tilt happens when one side of the pelvic appears higher than the other.
Traditionally, lateral pelvic tilts have been suggested to be caused by tight muscles like the Quadratus Lumborum (QL) and other muscles around the pelvis to be the culprit of this postural presentation.
However, if we peel back the layers and consider many of the other factors, you may appreciate how there is much more to it than the muscle-based theory.
What Causes A Lateral Pelvic Tilt
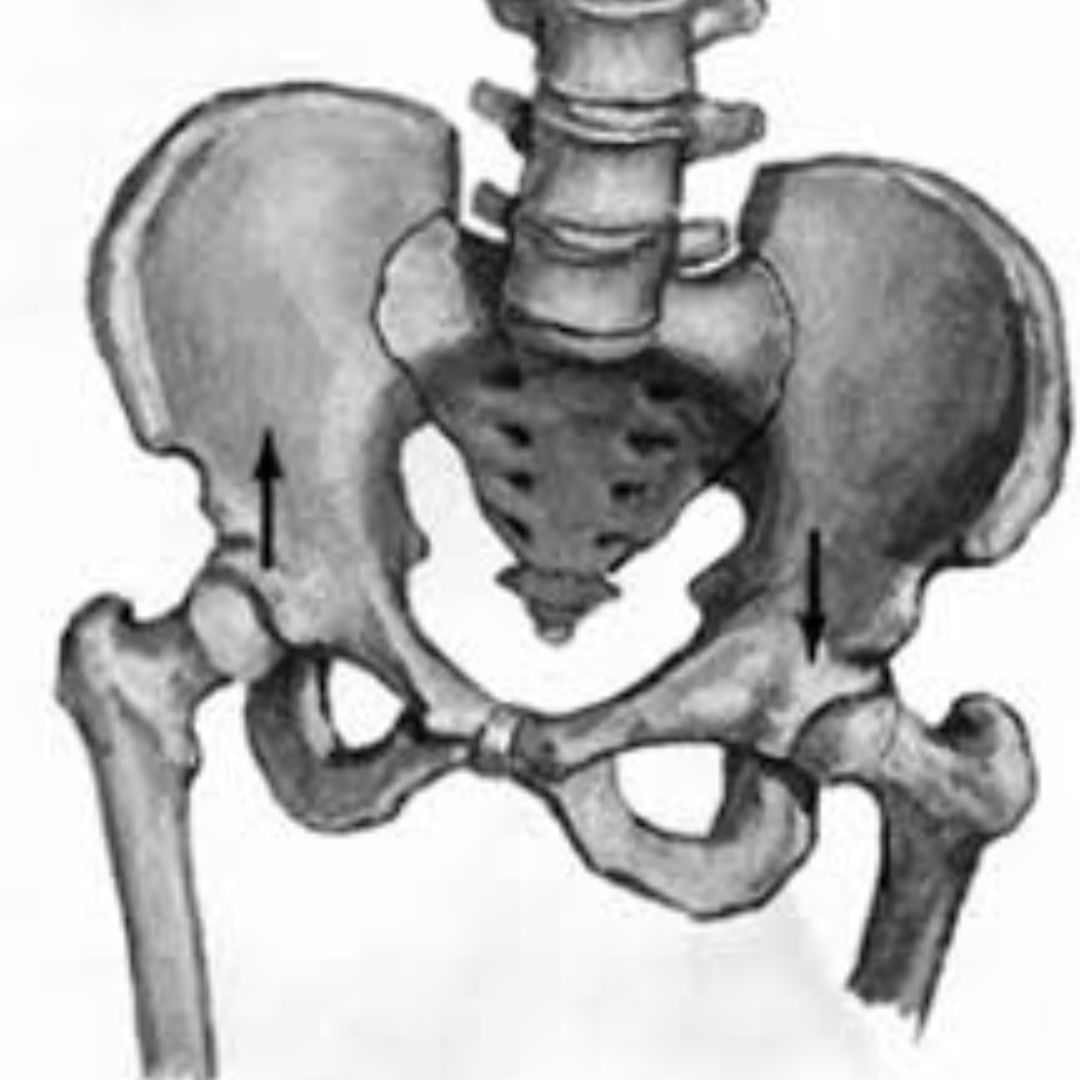
When visually looking at a pelvic tilt, there are a couple of key characteristics that become obvious other than the hip hike itself.
You will often see an arch in the lower back, knee that is caving in (or out depending on the amount of compensations/compression there is in the system).
You may also see an arch that is higher, on the same side as the hip hike, sometimes dumped inwards, depending on the amount of tension.
The reason why it typically looks like a supinated (higher arch) is because our centre-of-gravity is shifting towards that side, meaning the hips are rotated to that side (for example the right).
To stay within my base-of-support so I don’t fall over, I would need to be able to internally rotate my hip, knee and foot.
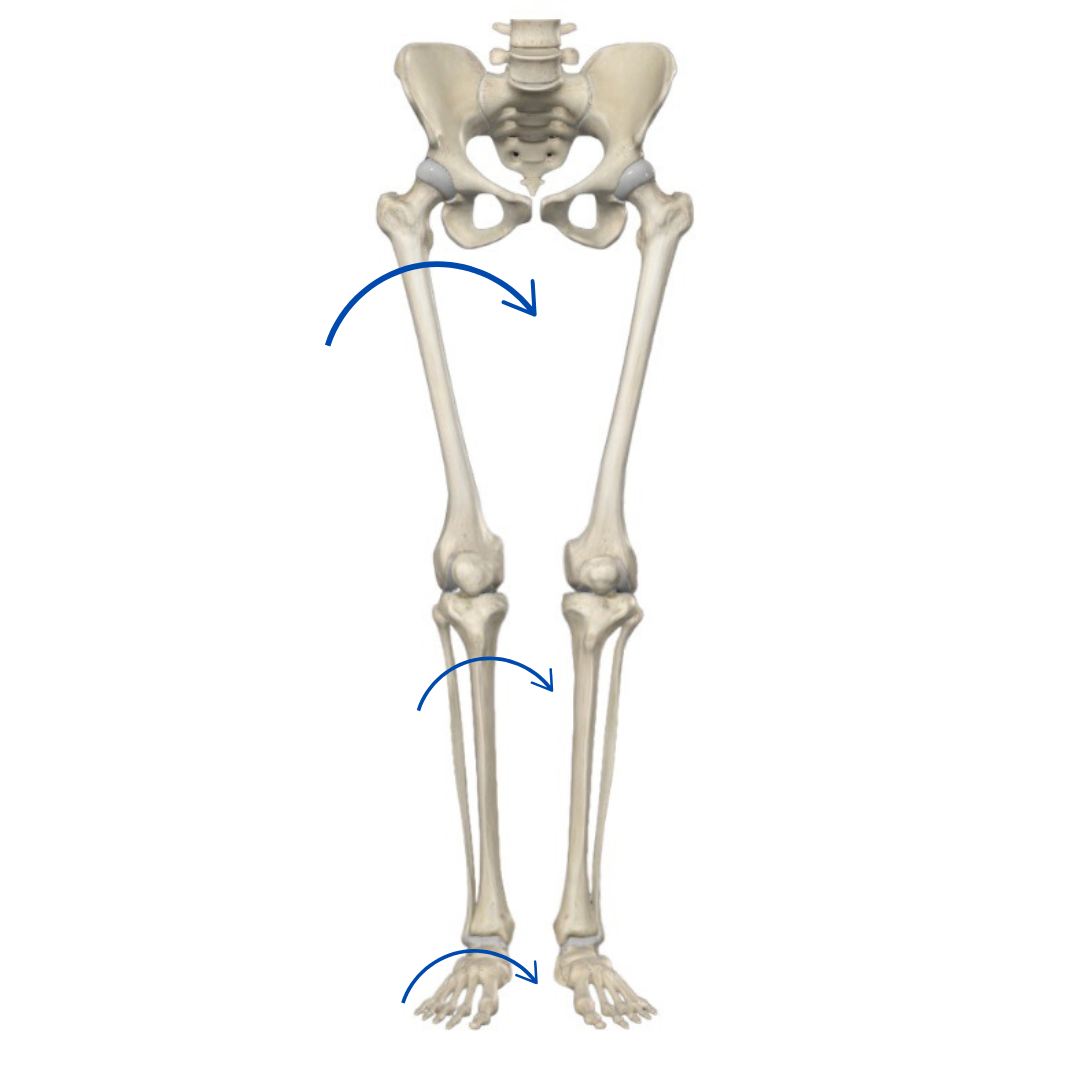
If I can’t do that, then I will hike my pelvis up to push me back in that base-of-support.
If you want to know how this feels, have your feet together and your arms crossed over your chest.
Turn your entire body to the right, you may feel your right inside arch lift up.
This is exactly what’s happening.
Now if you were to stay rotated to the right, and I stood beside you on the left, and pushed you more to the right, then to push back against me you would probably side bend your ribcage on the right, and hike that hip up on the right.
From an upper body standpoint, you’re going to see a right shoulder dropped (with a right lateral pelvic tilt), and a left shoulder that’s higher.
Insert photo of asymmetrical shoulders
Again this is matching up with the sidebend of the ribcage on the right.
As you can probably appreciate, I haven’t mentioned any muscles yet.
Instead, we are discussing the role of gravity, shifting of our body weight, that causes asymmetrical postural positions.
There are many more factors that I discuss in my EVOLVE Biomechanics Mentorship but for now, not to complicate things, this gives you an idea of what you may be seeing.
To circle back to the upper body, if you shrug your left shoulder up and round your right shoulder forward (which is what would happen with a right lateral pelvic tilt), then you’ll notice your ribcage is going to turn to the right.
“But Alex, I thought you said that the pelvis was turning right?”
It is, but in order to face straight I have to turn my ribcage back to the left to face straight ahead.
So now we have a pelvis facing right, and a ribcage relatively turning back to the left.
Although this is a normal pattern due to the asymmetries of the body (liver on the right, heart on the left, different attachment sites of muscle on each side, etc.) with further layers of compensation brought on by training, sports, job, pain, we can start to see these asymmetries become more apparent.
Assessment Differences
When we see a right lateral pelvic tilt, there are certain measurement differences you’ll see on both sides.
Specifically, you’ll see measurements on the right appear better than the left due to the rotation of the pelvis to the right.
You will also see similarities in the upper body as well which is why I mentioned that this is a full body event.
You can visually see the assessment and positional differences here in this video:
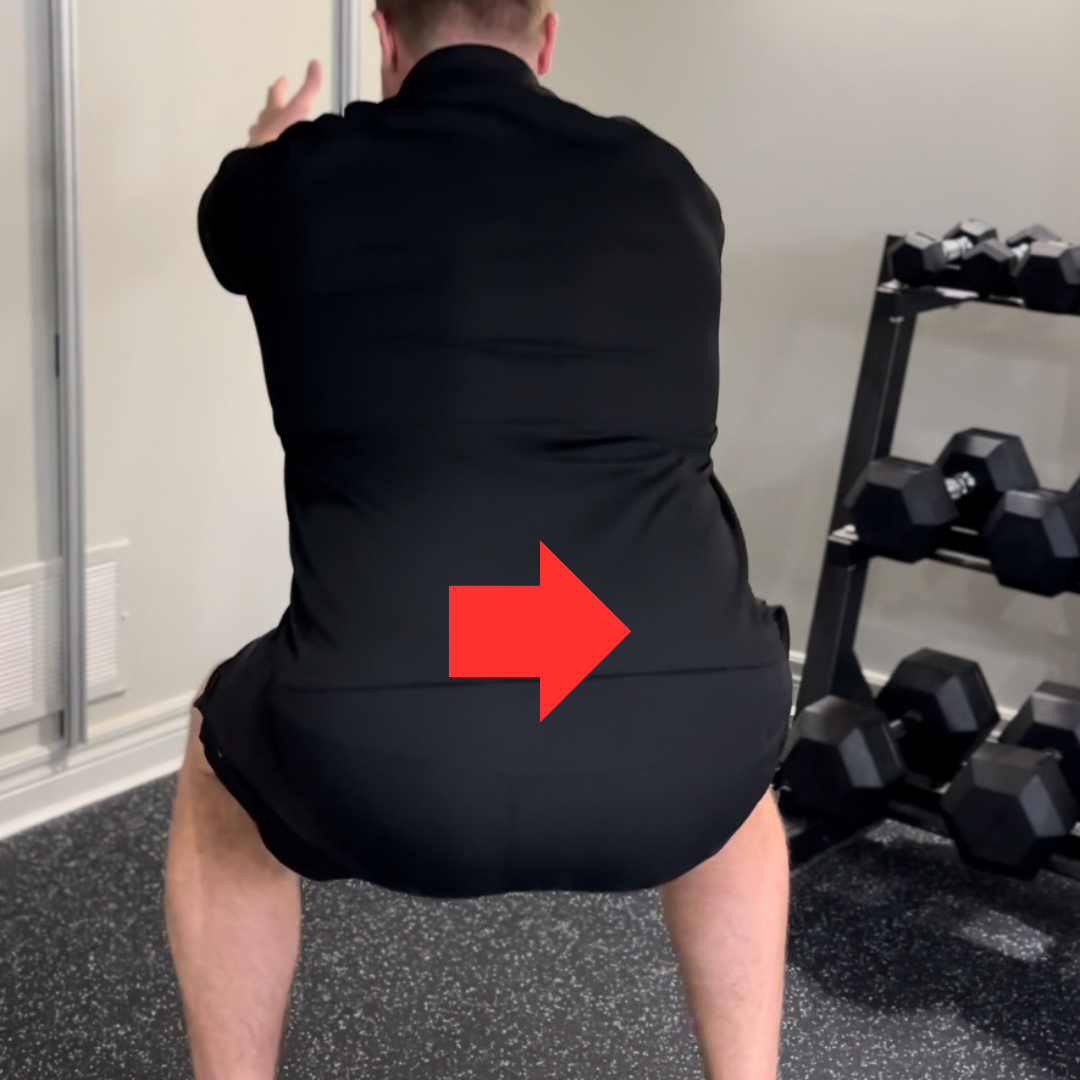
You may also see a hip shift in the squat (if right pelvic tilt then right hip shift)
You may also see asymmetrical presentations being illustrated at the feet which can impact the ability for the ankle to be able to move effectively on one side vs the other.
Exercises:
Based on what we discussed above, we have to first open the right hip, then push towards the left (to get off of the right leg), the bring our centre-of-gravity back on the left heel.
- Opening of the right hip with a hooklying right hip extension with rotation:
By laying on your back, you're going to be able to shift your weight back behind the foot which will open the back of the hip on the right to reinforce the ability to turn to the left.
Keep the tag of your pants on the ground, ball and heel of the foot in contact with the ground. Inhale as you reach right elbow across, exhale as you press right foot into ground.
2. Push off the right side towards the left
By holding the weight in the right hand, that is naturally going to help push me to the left. With the rear foot elevated position, there will be inherently more weight on the right leg which puts more force into the ground and turns my body to the left.
3. Finally, our objective is to bring the weight back on the left heel which is why this cable chop is such a great option.
The cable is going to naturally pull you forward towards you so naturally you have to shift your weight back. By pulling the cable down towards the back foot which will naturally bring the weight back more.
Round-up:
Lateral pelvic tilts are more about weight shift and centre-of-gravity rather than muscles.
The better we can understand the underlying mechanisms behind some of the compensations, the better we can select the most appropriate exercise.
If you want to learn more about how I assess compensations or movement limitations like this, and, most importantly, pick exercises based on these compensations, then check out my EVOLVE Biomechanics Mentorship!

