
Two Deadlift Hinge Variations I Use Early On With Clients (And When to Use Each)
Aug 13, 2026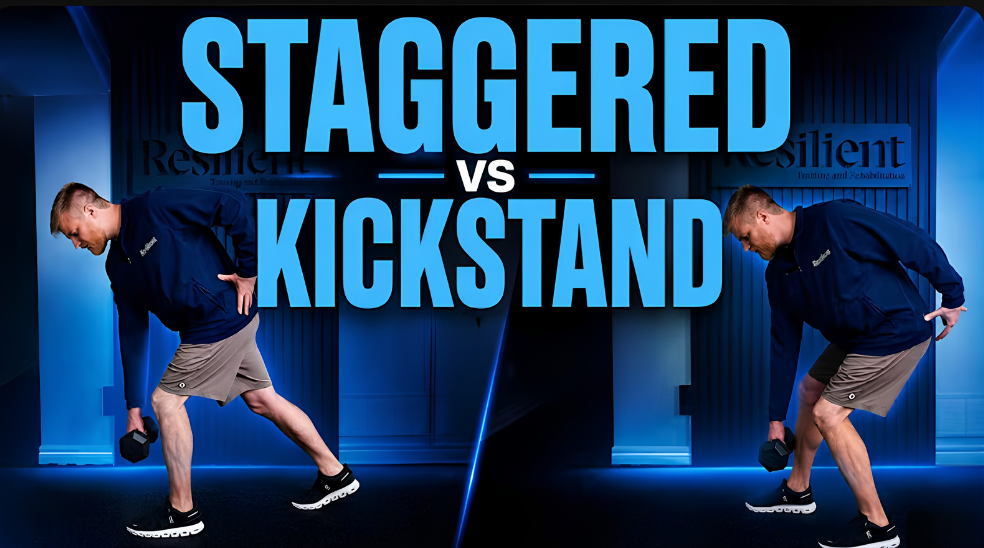
There are so many deadlift variations out there that it's easy to get stuck on which one to pick and when. Some coaches default to whatever hinge they learned first. Others rotate through variations without really knowing why one might work better for a specific client than another.
I want to break down two of my favorite hinge variations, the ones I reach for early in the program when I'm working with a new client. They look similar on the surface, but they're solving two completely different problems. Once you understand what each one is actually doing at the hip, you'll know exactly which one fits the person in front of you.
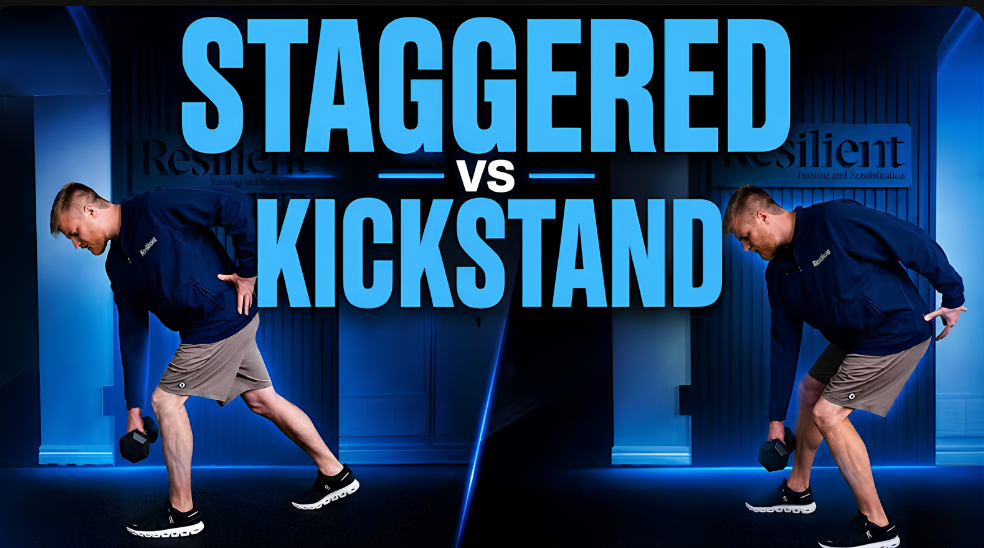
The Staggered Stance Hinge
This variation is for the client who's missing hip flexion or internal rotation. If that's the case, you're usually looking at a pelvis that's rotating away from that side. The sacrum faces one direction, the abdomen pushes that sacrum forward, and now the client has a rotation pattern working against them every time they bend over.
The staggered stance hinge turns the pelvis back into that side. With the left foot back and right foot forward, the pelvis rotates toward the left. That staggered position also changes how the surrounding muscles engage. You're getting more rotation through the pelvis, opening up the back part of the hip, and specifically targeting the lower glute along with the hamstrings.
The real goal here is creating space between the sit bone and the sacrum. If you can create that space, you can help the client sit into their hip and start to regain the internal rotation they're missing. This makes it a natural precursor to something like a kickstand hinge, which asks for a lot more internal rotation than most clients have available to them at this stage.
This exercise tends to work especially well for clients who clench or squeeze through their glutes during other movements. The staggered stance hinge opens up the lower part of the hip instead, which is a different demand than the upper glute fibers you'd target elsewhere.
How to Set It Up
Start with feet just outside shoulder width. This width matters. Go too narrow and you'll often see the client hyperextend their knee to compensate for a hip that can't extend the way the movement is asking it to.
From there:
- Line your laces up with your left toes
- Turn your torso so you're over top of the left leg
- Bend over as you reach the right knee forward
- Keep both knees bent throughout, avoid letting either knee come back
- Feel the load through the inside part of the right foot and the heel
If you want more rotation to the left, add pressure to the outside part of the left heel.
One common compensation to watch for: clients over-rotating away from the working hip instead of turning into it. From behind, this looks like the body twisting away rather than staying stacked. If you see this, open up the right foot slightly so the client can push over the top of the working leg instead of around it.
The main cues to give:
- Press with the inside part of the right foot while keeping the knee bent
- Stay locked down on the left heel
- Lift the hips up rather than sending them back, which keeps both knees bent throughout the movement
The Kickstand Hinge
The kickstand hinge is a natural progression from the staggered stance hinge, but it's solving a different problem. Instead of shifting weight through a staggered stance, you're lifting the back heel, which pushes more weight onto the front leg. It becomes a hybrid position, somewhere between having the back heel on the ground and having the leg lifted entirely off it.
Because this variation puts more load onto one leg, it demands more hip extension on that side. That changes what's happening at the pelvis. Instead of turning into the working hip like the staggered stance hinge, the kickstand hinge asks the pelvis to face forward and rotate slightly away from that side as you come up out of the movement.
This shift in demand also changes which part of the glute gets emphasized. Where the staggered stance hinge targets the lower glute fibers, the kickstand hinge works more of the transverse or rotational fibers.
How to Set It Up
Start with feet at hip width. Step back with the working leg, checking the distance carefully. If the back leg straightens out, you've stepped too far back. You want the balls of the back foot to stay on the ground the entire time, with the knee positioned underneath the back hip rather than trailing behind it.
Stance width matters here too. If it's too narrow, the hip tends to drift out to the side or over-rotate. Widening the back foot slightly can correct this and keep the client stacked over the front leg.
The cues to give:
- Keep the front knee bent and stationary throughout
- Lift the hip up as you bend over, rather than sending it back
- Let the knee stay put while the hip moves around it
Done correctly, the client should feel a strong stretch through the center of the glute along with more engagement through the upper hamstring.
Choosing Between the Two
These two variations aren't interchangeable, and picking the wrong one for a client's limitation can reinforce the exact pattern you're trying to change. If someone is missing hip flexion or internal rotation, the staggered stance hinge gives them a way to regain that rotation before asking for more. If someone needs more hip extension, the kickstand hinge asks for exactly that.
I walk through both of these variations in detail in this week's video, including live coaching cues and what the compensations actually look like in real time. If you want to see the full breakdown, check out the video here.
These two hinges are just a small piece of a much bigger system. If you want my complete breakdown of hinge variations, squat variations, rows, and how to progress each one based on what a client needs, that's exactly what I built the Resilient Roadmap to Exercise Selection course to teach.

