
Why Most Rotator Cuff Rehab Fails (And 3 Better Exercises That Work)
Jul 28, 2025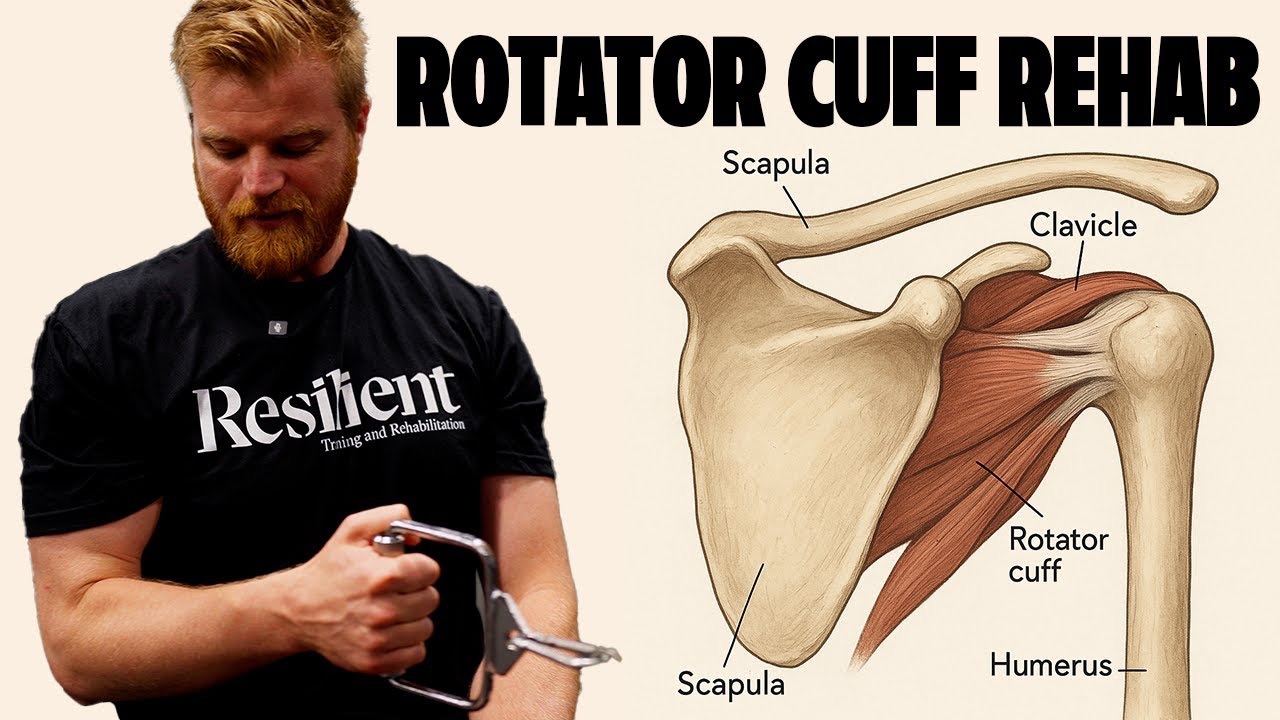
Are you doing basic rotator cuff exercises like banded external rotations and internal rotations? Maybe you've been given the YTW..
Chances are you’re missing the core principle: muscle function is dictated by joint position.
In rotator cuff rehab, many standard protocols fall short because they isolate a small muscle and ignore how the scapula, rib cage, and pelvis impact shoulder biomechanics.
In this article I am going to discuss:
- The anatomy of the Rotator Cuff
- Why Rotator Cuff rehab fails
- Compensations at the shoulder that impact the rotator cuff
- 3 exercises that are better than the traditional methods
Rather watch the a video tutorial? Watch here:
Why Traditional Rotator Cuff Rehab Often Fails
The rotator cuff (supraspinatus, infraspinatus, teres minor, subscapularis) is tiny compared to the shoulder complex.
What actually matters is how the scapula glides over the rib cage—and that rib cage’s position affects cuff function.
The scapula is concave (dented inwards) so it must rest on something that is round or (convex).
If your scapula is resting on a flat ribcage or the scapula is overly retracted/rounded, the rotator cuff muscles are mechanically disadvantaged, appearing weak on EMG not because they’re weak, but because they’re out of position.
Studies confirm that scapular stabilization exercises yield large reductions in pain (Turkmen et al, 2025) and improved function.
You may be activating the upper trap and deltoid more, which actually press the humerus into the socket which is the counterintuitive to the rotator cuffs job.
The Compensations That Impact Your Shoulder
When joint positioning is compromised, the body compensates to move or produce force depending on the task.
These compensations can look like strength but can lead to overload, overuse and dysfunction.
1. Scapular Elevation (Upper Trap Dominance)
When the rib cage is flat or extended, the scapula slides up and over instead of around the ribs.
This causes the upper trap and deltoid to dominate movement, jamming the humerus into the socket, and compressing the supraspinatus which is when you start to feel impinged.
2. Rounded or Drooping Shoulder
When you see a dropped shoulder, it’s often a sign the rib cage is pushing forward and down due to a lack of internal rotation on that side or a pelvis turning that way and the ribcage is trying to counterrotate to the other side.
Otherwise your whole body will turn one way and you'll be walking around in circles.
The rotator cuff is left long and under tension, struggling to stabilize the joint.
3. Squeezed Shoulder Blades
Excessively “retracted” scapulae (e.g., from constant cues like “shoulders back and down”) prevent the cuff from finding a functional path of motion.
The shoulder loses variability and gets stuck in the wrong shape.
The Better Way: Rotator Cuff Rehab Through Joint Positioning
If we reposition the rib cage and scapula correctly, we create the space and leverage needed for the rotator cuff to work efficiently.
Here are three exercises from the video that embody this biomechanical-first approach:
1. Seated Cable Row with Rotation and Breath
I really like this exercise because it reinforces joint positioning, its an exercise that is programmed in many strength sessions, and it feels like you're training rather than doing rehab.
Instead of jamming the elbow behind the body, you stop the pull at mid-rib cage and rotate the torso slightly toward the pulling arm.
Key cue:
Take a deep inhale while holding the pull—this expands the chest and upper back, reducing tension on the trap and deltoid and allowing the supraspinatus to gently pull the humerus out of the socket.
This is one of the most effective cuff rehab drills—without ever isolating the cuff.
2. Bottoms-Up Kettlebell Carry
Why it works:
Holding the kettlebell upside down forces your scapula to wrap around your rib cage, not retract. This naturally sets the rotator cuff into a stabilizing role as it fights micro-instability.
Pro tip:
Turn your head slightly toward your bicep while walking to open up the upper back and improve thoracic positioning.
3. Lat Hang in Deep Squat
Why it works:
By hanging from a bar while in a squat, you create traction without compressing the shoulder like a strict overhead press would.
Breathing tip:
As you breathe in, your rib cage expands, the lats relax, and your shoulder blade moves freely—again giving the rotator cuff room to function.
Core Takeaway: Muscles Don’t Fire in a Vacuum
Trying to strengthen the rotator cuff without restoring the scapular-rib-pelvis relationship is like tightening a screw with a bent screwdriver.
Muscles follow bones—and bones follow pressure and breath.
So before jumping into doing the traditional exercises, ask yourself:
-
Is the scapula in a position to glide?
-
Is the rib cage providing a rounded, mobile foundation?
-
Are the deltoid and trap compensating for poor cuff leverage?
If the answer is no, fix the position first.
If you want to deeply understand functional anatomy, joint positioning, and better exercise selection, then check out my Foundations of Biomechanics Course.
Over 900 trainers and clinicians have already taken it and used these principles to get faster, more consistent, and long-lasting results with their clients.
Final Thoughts
The rotator cuff doesn’t work in isolation. It’s a function of joint position, rib shape, and breathing mechanics. Respect that, and you’ll rehab shoulders faster, more intelligently, and more sustainably—no endless band drills required.
Want to future-proof your programming?
Understand the anatomy. Respect the structure. Then choose the right movement.
Keep Moving,
Alex Effer

